We have also prepared a special issue in the form of a video, which describes the individual stages in more detail.
Frame rate, or the time between frames, is a very important indicator of how smooth a game is. But if on PC we can simply measure their values using various overlays, then on consoles it is definitely not so simple. But if you watch content from Digital Foundry, for example, you probably know that frame rates can be measured on consoles as well. But how to achieve this and can you try something like this yourself? The answer to the second question is yes, and I will try to answer the first in the next text.
What we need:
- Card cutting
- Image Capture Software (OBS)
- Frame Rate Analysis Software (Trdrop)
What is a cut card
Since the frame rate cannot be measured directly on the console itself, and the recording capabilities on it are very limited and not suitable for our needs, we will have to use an edit card. A device that is located in the middle between the console itself and the monitor or TV. The image passes through the editing card not only to the display device, but also to your computer or laptop, where you can continue working with it. This is an ideal solution for capturing video from a device other than the one we are recording on.
How to choose a cutting card
Since many of you probably won’t have a cutting card at home, I thought I’d include some tips for a potential purchase here. We mainly distinguish between two types of editing maps: internal and external, the differences of which are probably quite clear from the names themselves. The internal editing card, such as a video card, connects directly to the computer via a PCIe slot, while the external one is portable and connects via a USB cable. Until recently, it was believed that internal clippers usually have better parameters, but this is no longer entirely true.
You will be interested in choosing the following things. First of all, of course, the maximum supported resolution and frame rate or various combinations thereof, which must be carefully studied. Most importantly, you need to differentiate between pass-through (the image that goes to your monitor or TV) and capture (the recording image that goes to your computer). The values can often be different (for example, passthrough is 4K 60, but capture is only 4K 30), so be careful.
The format of the video that is transferred to your computer can also be a deciding factor. Previously, cards often had their own encoder, which “degraded” the video in advance. Today it is common to obtain an image without visual loss, but it is still good to ensure such characteristics when purchasing. For example, some cards have the highest resolution and frame rate combination “locked” behind MJPEG compression. This is not a problem for classical use, but is unsuitable for frame rate analysis. It’s also important to support technologies like VRR and, for some, HDR imaging, but this again may be limited to certain resolutions and frame rates. In short, map editing is a whole science; if in doubt, I recommend watching the video of the EposVox channel, which deals with map editing and video compression.
One way or another, there are two largest manufacturers: Elgato and AverMedia. I only have personal experience with the first brand, but there are also very good reviews about cards from AverMedia. Recently, new products from both companies have entered the market, which fully support HDMI 2.1. Ironically, external cards have received more attention, while the Elgato 4K X is probably the best editing card on the market at the moment (which I personally use too) as it supports both pass-through and 4K capture 120, while competition from AverMedia is only end-to-end. But if you don’t need the best of the best, you can choose a cheaper option. For example, before the release of 4K X, I enjoyed using the Elgato HD60 X.
Recording Software (OBS)
When we already have the hardware through which the image gets to the computer, we also need software that can download and save the image. Personally, I only have experience working with the relatively popular OBS, but you, of course, can use any other software that you prefer, although certain specifics are required. First, you need to set your edit card, resolution, and frame rate correctly. If you have your console turned on and you can see the image in OBS, you can move on. Otherwise don’t panic, when the screen is black you can often just use the simple “just turn it on and off” advice, in which case unplug and reconnect the edit card’s USB cable to the computer (if you have an external card).
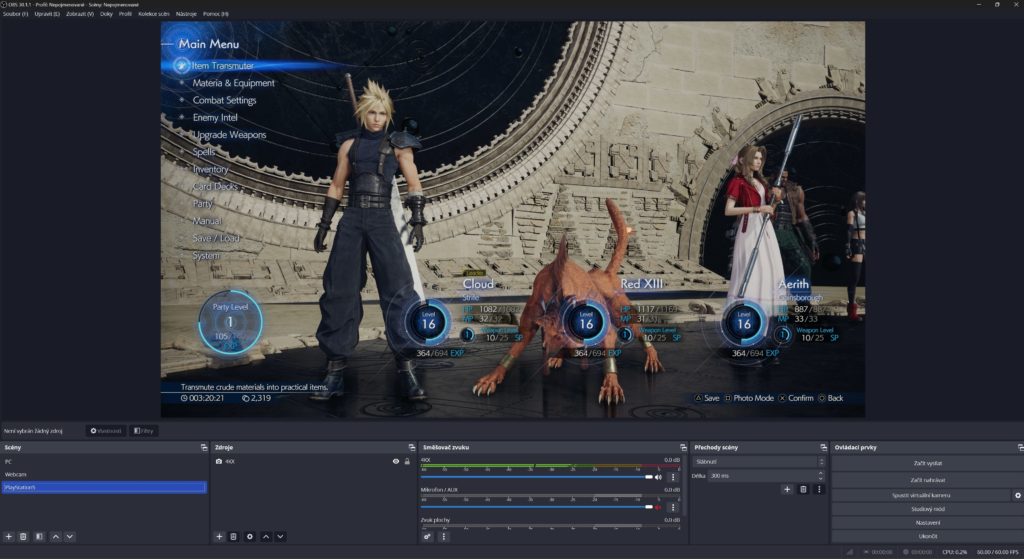
The good news is that you won’t have to fiddle around with the settings much, but there’s a pretty big catch here. To properly analyze frame rates, we need images without visual loss. Even if we used high-quality compression, for example through AV1, and a relatively high bitrate, the video would still have certain (albeit difficult to discern by the eye) artifacts that would make quality analysis impossible. The image must be absolutely clean, and therefore it is necessary to strive for this not entirely ideal, but the only possible option.
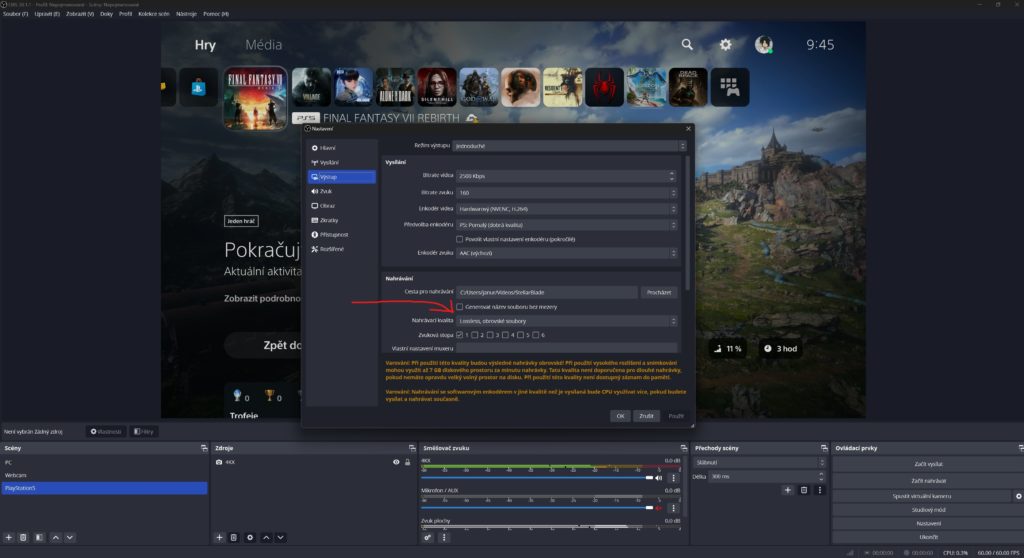
Lossless imaging requires its own effort, and the resulting file sizes are huge. If you record in 4K, then easily more than 5 GB per minute. But this is a fact that practically nothing can be done about, and only a sufficiently large storage facility can cope with it.
Otherwise the setup is very simple, you have two options here. The easiest way is to select “Simple” in the recording settings, and then select lossless quality (use the UT codec with a very high speed, but also increased requirements for subsequent work with the saved video).
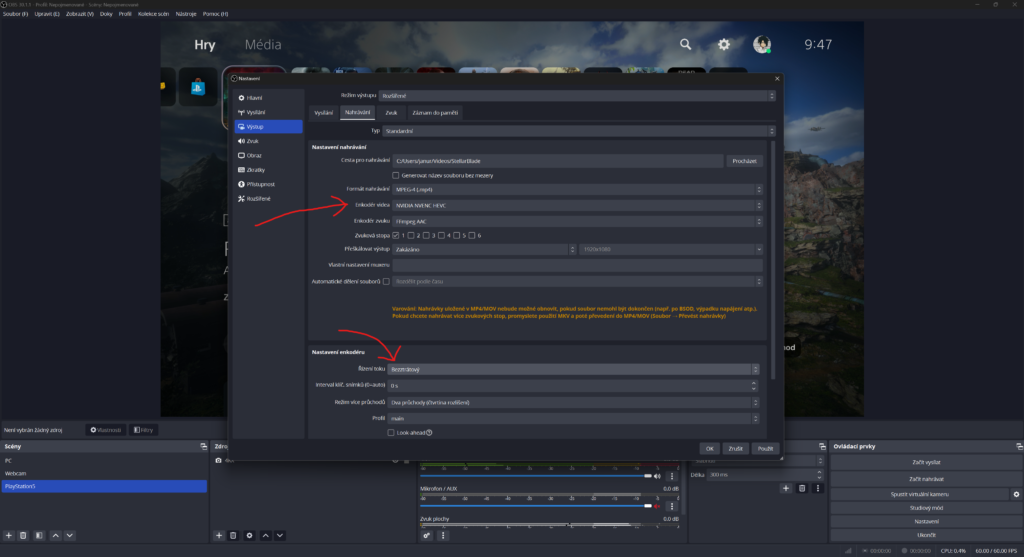
The second option is to leave the advanced settings and select your preferred codec that supports lossless compression. If you have an Nvidia graphics card, I recommend using NVENC HEVC (H.265) to shift the load to the GPU. The files will be large in any case.
Frame rate analysis (Trdrop)
When we have already shot the footage, we can finally begin the analysis itself, but here the choice of software is already quite limited. Although Digital Foundry uses their own, now very complex software, they only have it for their own purposes. So you have to rely on the work of people who are ready to share their creations, and since measuring frame rates on consoles is, in fact, a rather “niche” matter, there is practically only one option: Trdrop. Although the author initially promised a full-fledged second version with a number of improvements, after two years of silence I wouldn’t even expect that we’ll ever see it. So we have to rely on version 1.2, which so far works without problems.
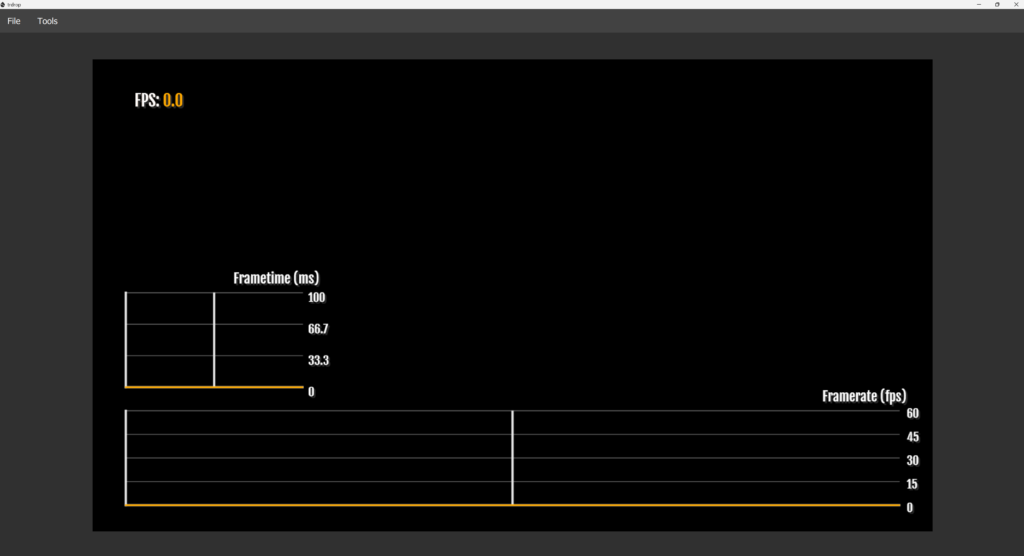
After launching the program, you need to add a video file whose frame rate you want to analyze; there can be up to three of them next to each other at the same time. Subsequently, you will be able to see how the data will be displayed. At the bottom is the frame rate timeline, to the left above it is the frame time axis (that is, the time between frames), and at the top left is the current FPS value. If a break then occurs, it will be shown in the video as white lines.
In the settings, you can adjust a number of parameters, including frame rate range, color used, and so on. However, you need to set the Pixel Difference, I personally recommend a value of 7. This is because Trdrop works by converting each image to grayscale and then comparing the difference between the two images (new pixels are white, old pixels are black). If the difference is sufficient, then this is a new picture, if not, then it’s still the same, i.e. duplicate image, which means a drop in frame rate.
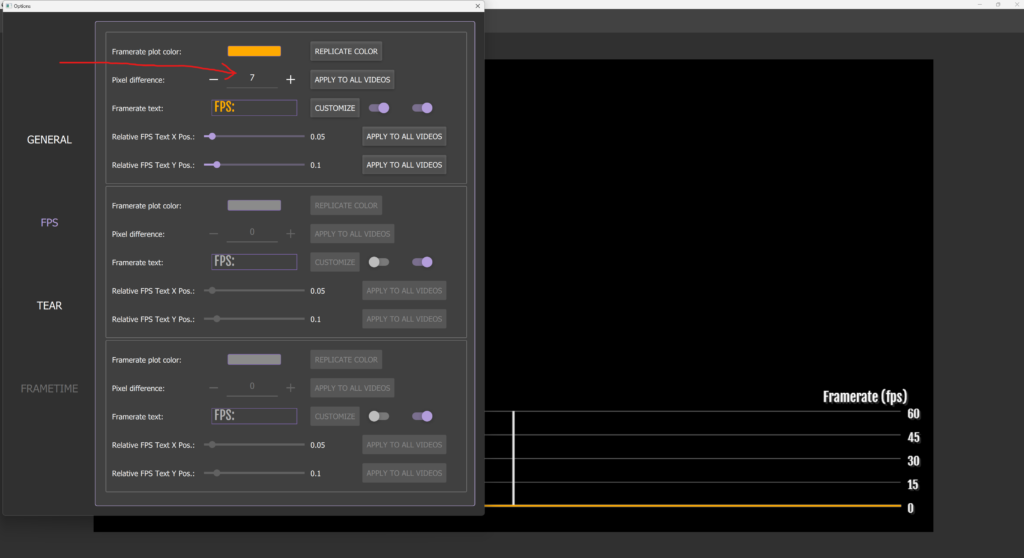
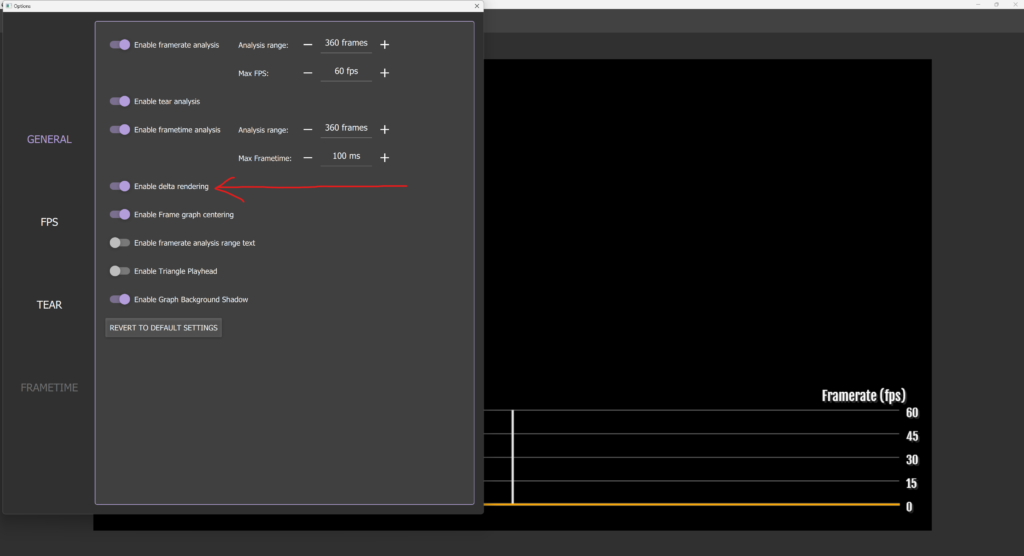
So the pixel difference sets the pixel tolerance (from 0 to 255), although neither extreme value is ideal. If you set it to 0, the program will treat even duplicates as new frames, and from a 30 fps image you will have 60 fps on axis. If you set it to 255, then, on the contrary, Trdrop will also perceive new frames as duplicates and the measured frame rate will be significantly lower than the real one. If you want to check if the functionality is correct, you can enable delta rendering, which will show you directly the grayscale image the program is working with.
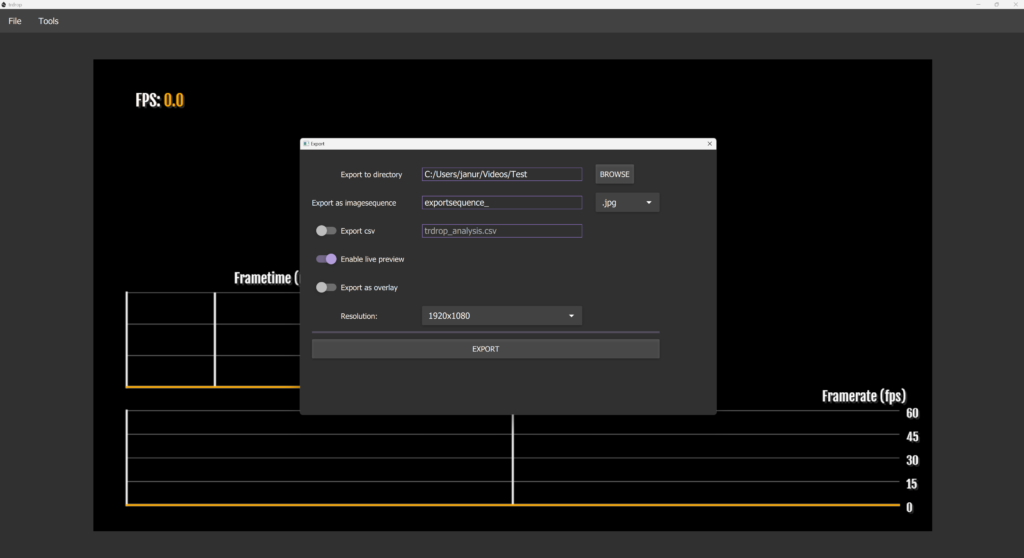
Once you have everything set up, you can start exporting. Be careful though: you can’t export video directly, everything is saved frame-by-frame into images (JPEG or TIFF, your choice). In any case, you can choose whether you want to export a pure catsuit (which will then have to be associated with a video), which is a faster option, or a catsuit with video, which is of course more demanding, but will save you. Job. Of course, it’s also important to choose the resolution you want to render the result in, or the option to enable live preview so you can see what the frame rate looks like while rendering.
And we’re done. If you want to convert a sequence of images back into video, simply move them all into a video editing program (I personally use DaVinci Resolve) and render. As you can see, the matter is not entirely simple, but it is definitely possible to analyze the frame rate even without significant technical knowledge. The biggest obstacle here is the file size, which makes it impossible to effectively measure FPS over longer sections. Unfortunately, this is a problem that can only be solved by measuring the frame rate in real time, which Trdrop does not allow, but perhaps we will see such a program someday. Anyway, until then, good luck with your frame rate measurements.
Source :Indian TV


